Magic Mint Chocolate Smoothie

Magic Mint Green Smoothie

Ok. So I have officially changed my stance on smoothies in the morning. I know I said that I’d rather have a meal with all the smoothie ingredients, but that was until I discovered the magic of chocolate and mint.

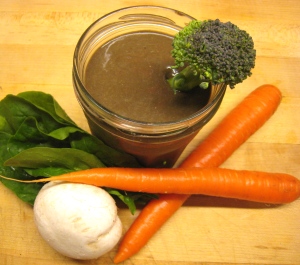
The real magic here is that the smoothie is made up of all vegetables, except for one frozen banana. Yep, one banana, and the rest is straight veggie goodness. No more sugar head rush or instant hunger 10 minutes after drinking it. Normally, this would taste like a sweet salad in slime form (yuck!) but add some cocoa powder and peppermint oil and BAM, you have a mint chocolate milkshake.

The natural bitterness of the cocoa powder masks any bitterness from the vegetables (kale, I’m looking at you, here) and the peppermint really brings out the natural sweetness of the banana. You can use almost any vegetable that is mild in flavor and isn’t too stringy. I’ve used:

  • kale
  • spinach
  • beet greens
  • carrot
  • broccoli stalks
  • cauliflower (stalks and head)
  • mild mushrooms (these add a strong flavor, try only a tiny bit at a time)
  • turnip
  • asparagus

Pretty much anything goes except for the obvious like garlic or onions.

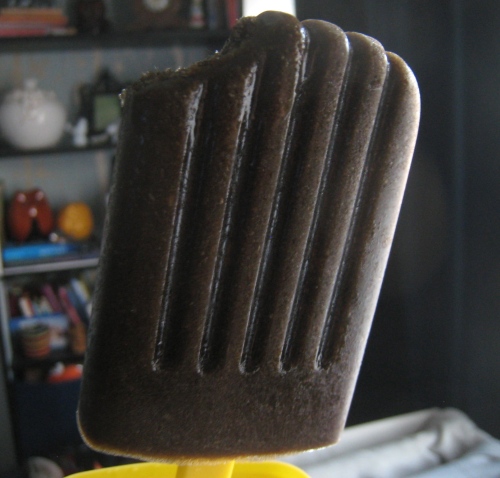
And my favorite way to eat them lately? Popsicles!

Magic Mint Fudgesicle

It’s finally been getting warm here in San Francisco, and there’s no better way to celebrate it than a icy cool  mint fudgesicle! My smoothie was about 300 calories, and made 6 popsicles. That means each one was only 50 calories! The molds I just bought are the best popcicle molds that I’ve ever used.

You can experiment as much as you want, to get the perfect combo of veggies.

Magic Mint Chocolate Smoothie

  • 1 cup milk of choice
  • 1 cup mild leaves, such as spinach
  • 1 cup chopped vegetables
  • 1 frozen banana (very ripe)
  • 6-10 drop stevia extract (or sweetener to taste)
  • 10-15 drops peppermint extract (use less if using peppermint oil)
  • 1 tsp vanilla extract
  • 2-3 Tbs cocoa powder
  • 3/4 cup ice cubes

Place all ingredients in a blender and blend on high until well blended. If not using a high-speed blender, make sure to chop vegetables finely.

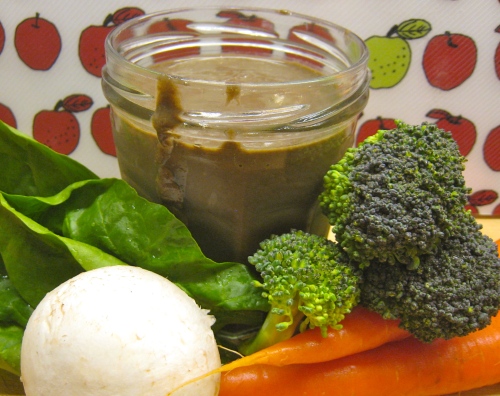
Pirate Mint Chocolate Smoothie

Arrr! Pirate Green Smoothie!

Making Almond Flour

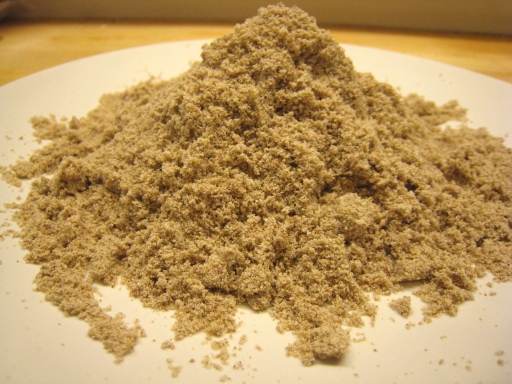
Almond Flour

Dark Almond flour from the Cinnamon Scented Coconut Almond Milk

A few days ago I posted about making almond milk. That recipe was special treat, but normally I make plain ol’ almond milk, with just almonds and water (and sometimes a wee bit of vanilla extract). Afterwards, you have a big glop of almond pulp left over, which doesn’t contain a whole lot of flavor. You could throw it away, but almonds aren’t cheap and it seems like a waste to just toss it. You could compost it, but living in the city, I don’t exactly have a lot of space for composting or a garden (although it’s on my bucket list!). What I like to do with almond pulp is dehydrate it and make some fluffy, delicious, gluten free almond flour!

Almond flour can be used to replace about one half of the regular flour used in any recipe. It can also be combined with other gluten free flours to make a great GF baking mix. Since most of the almond flavor went into the almond milk, the flour doesn’t impart a huge almond flavor to baked goods. But the flavor IS different than wheat flour, almost sweeter without being sweet.

Making almond flour from almond pulp is really simple. Most people save up the almond pulp in the freezer and make one big batch of flour. However, I make a batch every time I make the milk because otherwise the pulp would sit in my freezer until the next ice age! My freezer is the place that good intentions go to get freezer burnt and tossed out… It only takes a few minutes of actual effort, so making it as I go doesn’t feel inefficient to me.

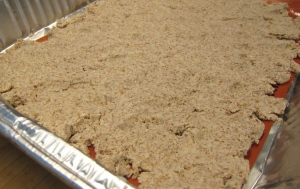
First, spread your almond pulp out on a tray or pan, as thin as you can get it. It wont stick to anything, so don’t grease the pan. If you have a dehydrator, set it to about 110 degrees. But if you only have an oven, set it to the lowest temperature possible (mine goes to 120 degrees).

Almond Pulp Spread on a Pan

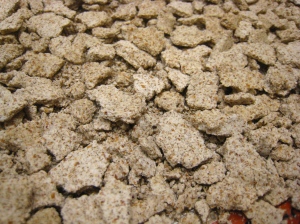
Let the pulp dehydrate for between 4 and 8 hours, depending on the temperature of your oven. About halfway through, break of the sheet of almond paste into small bits so that the air can circulate though and dry everything completely.
Broken Up Almond Pulp

Once the almond pulp iscompletely dry, place the chunks into a high-speed blender, clean coffee grinder, spice grinder or food processor. Grind up the almond chunks until they are a finely texture flour. That’s it! I store the almond flour in the freezer, and use it as I bake. One cup of almonds used in almond milk will yield about 1/2 cup of almond flour.

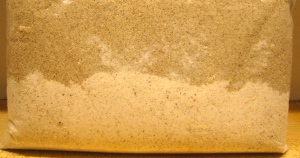
Here you can see the difference in color between flour that was about 75% de-skinned almonds and the cinnamon/coconut almond flour I made in the previous post. Surprisingly, the taste isn’t very different between the two, despite the difference in ingredients! I think it’s because most of the flavor went into the milk.

Broken Up Almond Pulp

Here’s a Chocolate Chip Cookie recipe (using almond flour) that I’ve been meaning to make, which will help get you started in the almond flour baking adventure!

Cinnamon-Scented Coconut Almond Milk

Coconut Almond Milk

Oh my goodness! It’s been one of those weeks, where I haven’t had time to even make myself a decent meal. I did end up making mizuna and yams for the third time (yes, it’s that good!), but otherwise it’s been cereal, leftovers from lunches out, and eating out. I did manage to find a little time to make some almond milk, based off an amazing recipe at Square One Kitchen (a great blog!).

I like my almond milk thin, more like store-bought almond milk, so I cut the almond and coconut in half, and just used one date, since I’m not really big on sweet drinks. I also soaked the almonds separately so that I could rinse and drain the almonds to get rid of the excess tannins from the skins. Finally, I added a pinch of cinnamon, just for kicks. What I ended up with was a rich, coconutty, cinnamon scented milk that was simply divine. It was so good that I forbade my fiancé from using it on cereal, because that would be a “waste”!

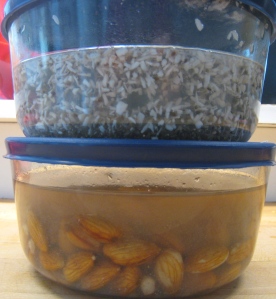
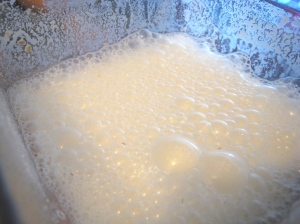
Making it is so easy, just the same as regular almond milk. Cover the coconut, chia seeds, dates and cinnamon with 2 cups water in a covered container. If using extract, add it too, but if using the vanilla paste, add it after you strain the milk, so you don’t strain out the vanilla beans. Soak the almonds in a separate covered container. Soak overnight or about 8 hours. After soaking, pour coconut and water into a blender, adding another 2 cups of water to make 4 cups total. Drain and rinse the almonds, then add to the blender. Blend on high until frothy and the almonds are well blended.

Almonds and coconut soakingBlended Almond Milk.

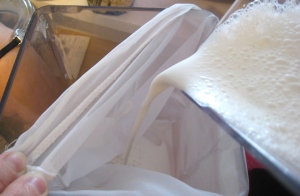
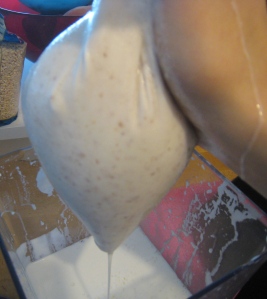
Now here comes the fun part, or the hard part, depending on how you look at it. I have found that the best and easiest way to strain the almond milk is to use a nut milk bag. However, you can use a fine mesh strainer, cheese cloth, or any other method you can think of. Hold the nut milk bag or strainer over a large container, and pour the milk mixture in slowly. Now pick up the nut milk bag and gently squeeze it, straining the milk into the container below. Squeeze until you can’t squeeze anymore. Then squeeze some more. You should feel like you are trying to draw water from a rock. But the drier you get the almond pulp, the easier it is to turn it into almond flour (which I will make a post on tomorrow!)
Pouring Almond Milk into a Nut Milk BagSqueeeeeeeze that Nut Milk Bag!

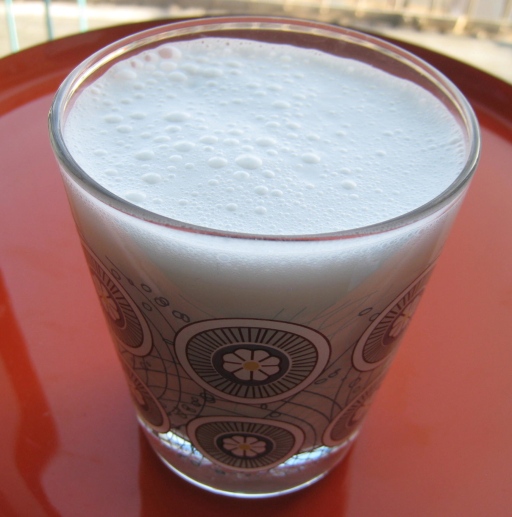
After all that squeezing, you can reward yourself with a hand massage nice cool glass of ccinnamony, coconutty, almond milk!

Coconut Almond Milk

Cinnamon-Scented Coconut Almond Milk

Based off the recipe from Square One Kitchen

Cover the coconut, chia seeds, dates, vanilla (if using extract add at end) and cinnamon in two cups water. In a separate container, cover the almonds with water. Soak both coconut and almonds overnight or for at least 8 hours. Pour coconut and water into blender, adding another 2 cups. Drain and rinse almonds and add to blender. Blend on high, then strain using a strainer or nut milk bag.

Coco-nutty Kale Chips

Coconut Kale Chips

The best time to go to a farmer’s market is on a rainy day. There are no crowds, and the venders are eager to sell you everything they’ve got for a song. I took my parents to one of my local farmer’s markets during their trip this weekend, and we were lucky enough to have it stop raining right before we headed out, so we got the best of both worlds! We came home with armfuls of goodies, including two large bundles of kale, because one lovely vendor was having a buy one, get one free deal. It usually takes me over a week to finish my kale, so I wasn’t quite sure what I’d do with two.

My mom suggested Kale Chips, so we gave it a go! My ancient oven in my apartment is basically non-functional, so I rely on my incredible counter-top Smart Oven to do my baking. This meant I had to bake my kale chips in two batches, which allowed me to experiment with the flavors. Another challenge I faced due to my tiny apartment kitchen is that I don’t have a salad spinner, since there is no more room to store a large uni-tasking tool. I learned a trick that all you salad-spinnerless folks would enjoy:

  • Place the wet leaves on a thin kitchen towel.
  • Grab the found corners of the towel to create a little basket for the leaves.
  • Now swing your arms around in a circle like a maniac.
  • The water will be drawn out and will spray everything in your kitchen with kale-scented water.

It actually works wonderfully, but make sure to do this outside!

Make sure the leaves are as dry as possible. After I did my crazy swinging rain dance, I removed the stems and let the leaves air dry.

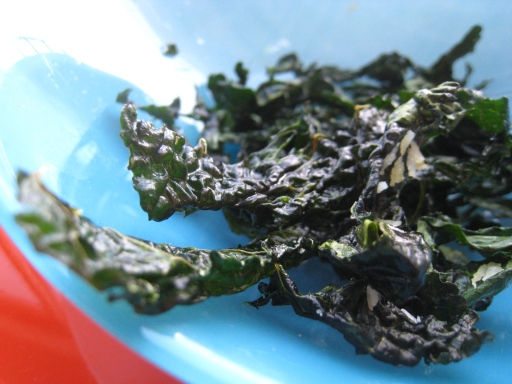
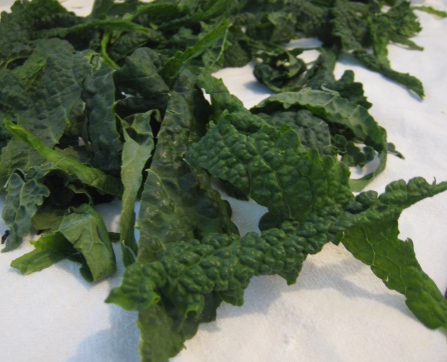
Kale Leaves

My first batch was just olive oil and sea salt, but it fell a little flat for me. I think I needed something to cover the still perceptible bitterness of the kale. Taking inspiration from the crispy kale bowl I made recently, I decided to add coconut and toasted sesame oil. It definitely did the trick for me!

Coco-nutty Kale Chips

  • 1 bunch kale
  • 2 Tbs shredded unsweetened coconut
  • 1 tsp toasted sesame oil
  • 3 tsp olive oil
  • sea salt to taste

Preheat oven to 275 degrees.

Remove stems, wash and very thoroughly dry the kale leaves. Mix together the sesame and the olive oil. Place half of the oil in your hands, and massage it into the kale, so that each leaf is completely coated. Use more of the oil as needed. Add coconut flakes and stir well.

Spread evenly on a non-stick baking sheet, ideally covered in parchment paper (but not necessary). Bake for 15-20 minutes, stirring at least once. You may need to remove some crispy leaves early to ensure they don’t burn. Sprinkle sea salt to taste.

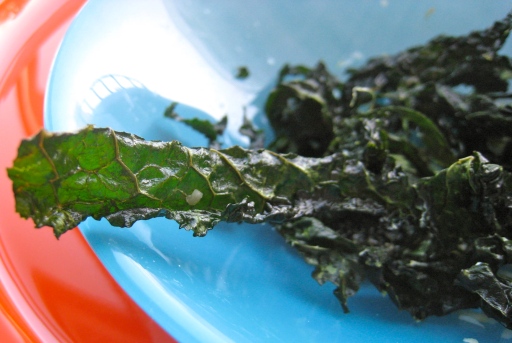
Coconut Kale Chips

Best Gift Ever

My parents came to visit this weekend, and as usual, they left my apartment in better condition than before they came! My parents are both extremely handy, and they are always ready and eager to work on any project that we can dream up. My favorite project this time was a custom made wall mounted iPad Frame. I’m so giddy about it that I HAD to share it!

I’m always using the iPad while cooking, and with my already teeny counters, it’s a challenge trying to find a spot for it. I usually end up having to move it around mid prep, covering it in dirty fingerprints and risking an ill-fated drop to the floor. So I told my dad about my iPad cooking woes, and he designed and made me this beauty:

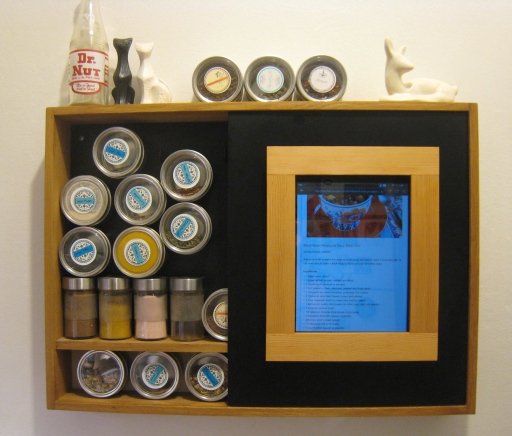
iPad Frame

The iPad (actually, I ended up using my HP Touchpad in it so the poor thing finally gets some use!) slides in from the top. There is an opening at the bottom, so I don’t even have to remove it to charge it. We mounted it to my spice cabinet (an Ikea Hack I made a few years ago) with this super duper ultra sticky tape. I’ve tested this tape, and I’m not worried about this falling off, ever!

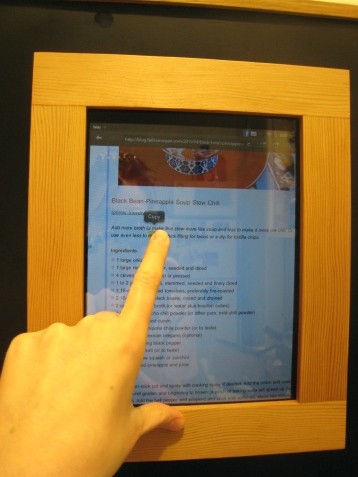
I’ve already used it twice while cooking, and WOW. This is what the future feels like! I don’t think I’ll ever need to print a recipe again. Thanks dad!! Here’s an action shot:

iPad Frame

You can see that I’m using it to make an incredibly delicious chili that netted me 2nd place in the Veggie Chili Cook-Off at work!

Strawberry Chocolate Chia Pudding

Chocolate Strawberry Chia Pudding

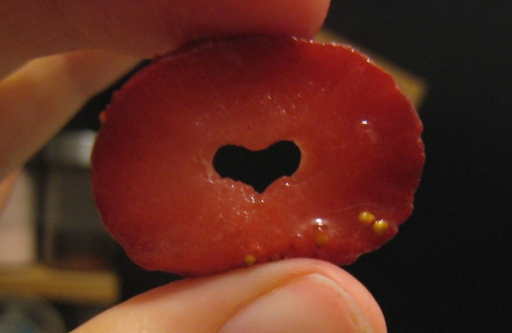
If you asked me, “what is the one food you would bring to a desert island?” I would answer: Strawberries. I love strawberries more than any other nourriture out there. Whenever I go grocery shopping, my fiancé will often lose me for a few minutes, only find me standing in the produce department, holding a container of berries, simply inhaling the glorious smell.

I Heart Strawberries!

I Heart Strawberries!

When the fiancé and I started dating, I would visit his mom’s place and join them for dinner. She is an incredible cook, and always had a feast laid out that would make a king envious. After a few visits, she noticed I wasn’t eating very much. My fiancé finally cracked and told her that I don’t eat cheese, that I detest cheese. Being Italian-American, a good part of her meals were oozing with cheeses of all kinds. She had a whole shelf devoted to cheese alone in her fridge. So she asked him, “what does she like to eat?” He replied simply, “Strawberries.” And so the next time I visited, she handed me a great big, Costco-sized bowl of sliced strawberries, a fork and told me that I wont go hungry that night! She has kept it a tradition that every time I visit, she always makes sure to stock up on the strawberries. I think I won the MIL lottery!

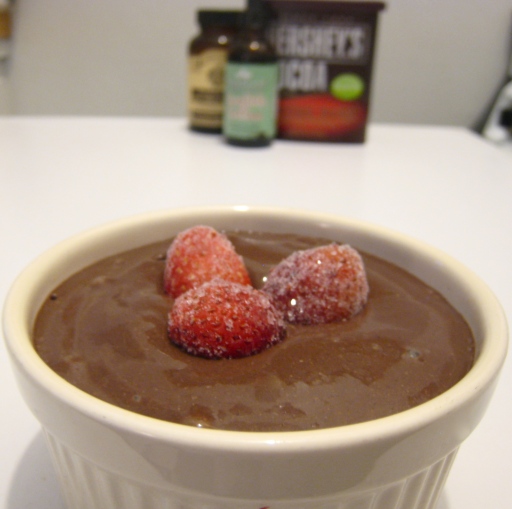
So this brings me to the pudding recipe. I was craving chocolate dipped strawberries, but had just finished off the fresh berries the night before. I have frozen strawberries stocked in the freezer always, but those don’t exactly make the best ‘dipping’ strawberries… I had tried making chia pudding before, with limited success, and thought I would give it another go. Blending the chia seeds sped up the gelling process by over double for me, and it also solved the ‘texture’ issue I had with the whole seeds.

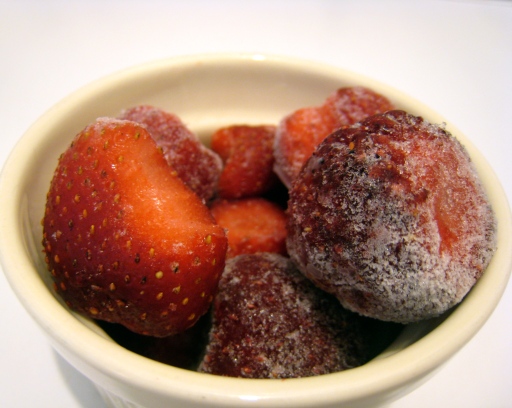
Sparkling Frozen Strawberries

The frost on these made them look like they had been dusted with glitter

This was rich and delicious, and just as satisfying as a chocolate dipped strawberry. I saved the last bit for the morning, and had it over a bowl of oatmeal, for an incredibly decadent breakfast!

Strawberry Chocolate Chia Pudding

Inspired by Chocolate Chia Pudding by Susan Voison

  • 1 cup milk of choice (I used almond milk)
  • 3 Tbs chia seeds
  • 1.5 Tbs cocoa powder
  • 1 tsp vanilla extract or paste
  • 2-3 drops liquid stevia OR
    1-2 Tbs sweetener, to taste
  • 1 cup frozen strawberries or other fruit of choice

Place all ingredients except berries into a blender. Blend on high for about 30 seconds. Scrape down sides so that all the chia seeds have a chance to absorb liquid. Let sit for about 30 minutes, pulsing at least once to break up any clumps. After the chia has thickened, add frozen fruit and blend on high until smooth.

Serves 3, 1/2 cup servings.

Crispy Coconut-Kale Barley Bowl

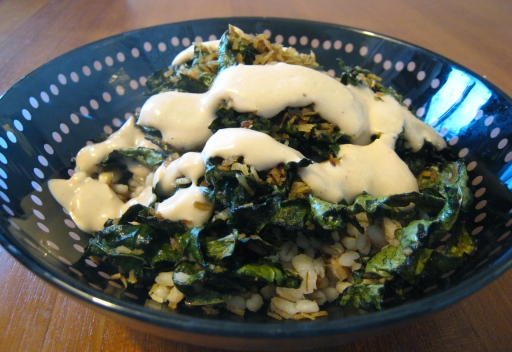
Crispy coconut kale

I am so glad I learned to cook in the age of the internet. I have tried so many new and interesting recipes, using ingredients and combinations that I never would have tried if I was just picking out cookbooks. There is something appealing about getting a first-hand review of a recipe, rather than speculating whether the meal will actually be good or not. I don’t know about you, but I have had my fare share of cookbooks where I swear the recipe was never tested. There was actually a cookbook that was so bad, after about 5 flops I was convinced I was a terrible cook. That thing went to goodwill, but it may have done more good in the trash!

I stumbled upon this recipe on Lemongrove Avenue, and I was immediately intrigued. Kale is a relatively new ingredient for me, and I’m always excited to try using it in new ways. Plus, add coconut to anything and I’m down with it. The original recipe called for 1/3 cup olive oil, which I just couldn’t stomach. Too much oil always makes me feel drowsy headache-y. I was able to cut it down to 2 tablespoons, which means I shaved off about 350 calories! The whole meal is extremely easy, and only took me about 30 minutes. Plus it was absolutely delicious, and is going on my “must make again” list.

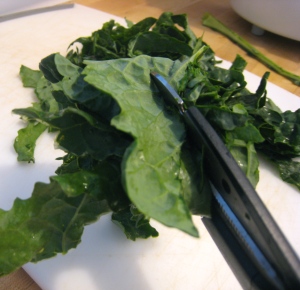
Roughly shred the kale. I usually tear the leaves off the stems, roll them into a cigar and cut with my kitchen scissors.

Chopping Kale

Mix the olive oil, sesame oil and soy sauce well. Pour a little more than half of the sauce over the kale and coconut and toss well.

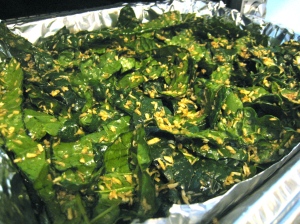
Crispy Coconut Kale

Bake kale and coconut for 15-20 minutes, until crispy.

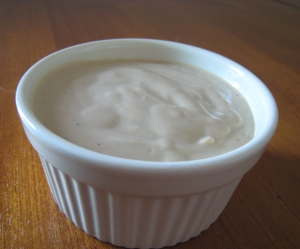
While the kale is cooking, pour the rest of the sauce into a blender. Add tofu, ginger, pepper and water and blend well.

Sesame soy dressing

Once the kale has become crispy, serve over grains and top with the sesame soy dressing. Enjoy!

Crispy Coconut-Kale Barley Bowl

Inspired by Lemongrove Avenue

  • 4 cups kale, roughly shredded
  • 1/2 cup shredded coconut
  • 2 Tbs olive oil
  • 1 tsp sesame oil
  • 2 Tbs soy sauce
  • 1/2 cup lite silken tofu
  • 1/4 tsp fresh ginger or 1/8 tsp ground ginger
  • 1/8 tsp cayenne pepper (optional)
  • black pepper
  • 2-3 Tbs water
  • 2 cups cooked barley, rice, quinoa or other grain

Preheat oven to 350 degrees.

Mix the olive oil, sesame oil and soy sauce into a small jar or bowl. Shake well or whisk to combine. Pour a little over half of the sauce onto the kale and coconut. Toss well to combine, and spread evenly in a large pan.

Cook kale mixture for 15-20 minutes until crispy, stirring occasionally.

While kale is cooking, pour remaining sauce into blender. Add tofu, ginger, cayenne, pepper and water. Blend until smooth.

When kale is finished cooking, place over grains. Drizzle about 2 Tbs tofu sauce over bowl.

Serves 2.

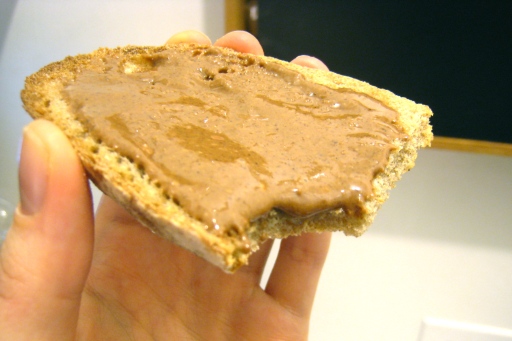
Almond Joy Nut Butter

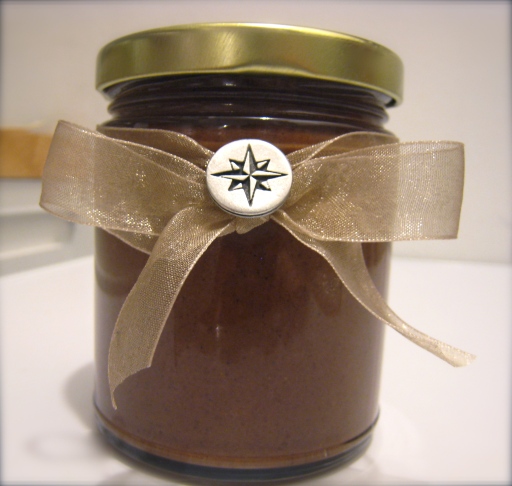
Almond Joy Nut Butter

Tied up pretty and ready to be gifted!

Growing up, each member of my family had their favorite candy bar. My brother liked Twix bars, I was a nerds loving fiend, my mom coveted Salted Nut Rolls, and my father inhaled Mounds bars, although he said he would prefer Almond Joy if they just used dark chocolate. My tastes have changed over the years, and while I still could eat a box of nerds in one sitting, I now usually prefer the much healthier dark chocolate.

After making a coconut butter and banana sandwich with cocoa powder sprinkled on it, I’ve had the idea for this nut butter floating around in my head. I wanted it to taste like my father’s dream version of Almond Joy, with lots of coconut and rich dark chocolate. When I got invited to a friend’s birthday party, I figured this was the perfect chance to try it out!

Almond Joy Nut Butter

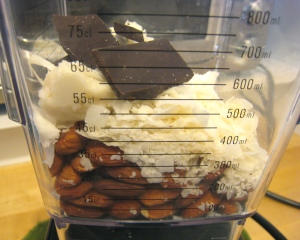
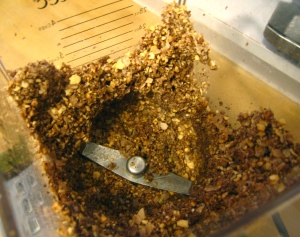
Making this nut butter couldn’t be simpler. First, toast the almonds until they are hot and fragrant. Don’t cool the almonds, because their heat will help melt the chocolate and make everything blend smoothly. Place the almonds, coconut flakes and chocolate into the blender and blend on low. The mixture will first look like nut meal.

Almonds, Chocolate and Coconut

Chopped Almonds, Chocolate and Coconut

Scrape down the sides, packing the mixture down each time. Continue blending on low until it begins to liquify. Blend on high until smooth. Add brown sugar to taste. It was so difficult to part with this, but I only allowed myself a few bites. I will definitely be making this again to keep! And since I’m on a roll, I think I may need to try a nut butter version of the salted nut roll…

Almond Joy Nut Butter

  • 1 cup raw almonds
  • 2 cups unsweetened coconut flakes
  • 1.75 oz dark chocolate (about 1/2 of a Trader Joe’s 3.5oz chocolate bar) OR
    1/4 cup chocolate chips
  • 2 Tbs brown sugar

Preheat oven to 350 degrees.

Spread almonds on baking sheet and bake almonds for 10-12 minutes, stirring halfway though. Roast until almonds become fragrant or begin to split. Remove from the oven and set aside to cool slightly.

Once almonds have cooled enough to touch but still hot, combine almonds, coconut flakes and chocolate into blender or food processor. Process on low until nut mix rides up onto the sides of the container. Scrape down the sides and pack the mixture down.

Continue alternating and blending and scraping until mixture begins to liquify. Blend on high until smooth.

Taste the mixture, then add sugar to taste.


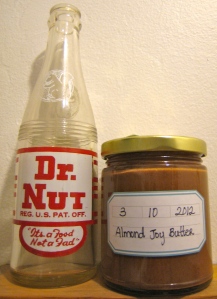
Almond Joy Nut Butter Next to Dr. Nut

Hanging out with the Dr.

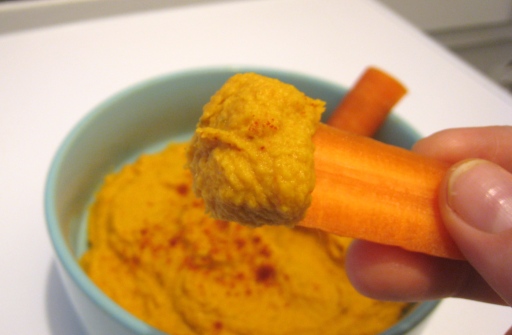
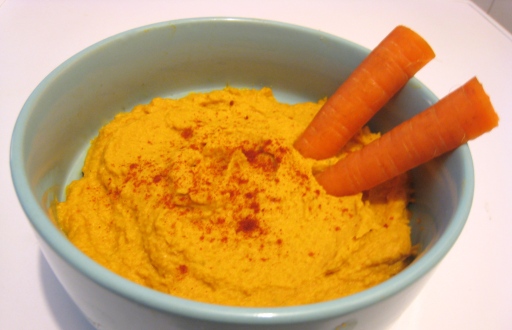
Smokey Sweet Carrot Hummus

Roasted Carrot Hummus

Hummus is one of my go-to dishes when attending or holding a get-together. It’s incredibly easy, and yet people are endlessly amazed and impressed by it. People seem to think it is difficult to make, and until I tried making it, I did too! Now, I think I make hummus on nearly a weekly basis, using it as a healthy snack, sandwich spread or salad topping. I make it a little different each time, so I never get bored.

Today, I was craving something lighter and sweeter than my usual spicy garlic variety. I remembered this carrot hummus from Fat Free Vegan, and decided to give carrots a try. I love dipping raw carrots in my hummus, so I figured roasted ones would be even better. And it was! The sweetness that the carrots gave just begged for a smokey counterpart, so I added some smoked paprika.

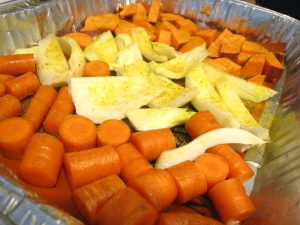
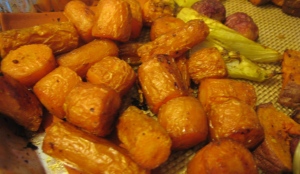
I roasted the carrots along with some other leftover vegetables, and I ate the veggies while I prepared the hummus. After the hummus was finished, I snacked on it with the remaining carrots. Best lunch ever!

Vegetables ready to be roastedRoasted Carrots

Smokey Sweet Carrot Hummus

  • 2 Medium carrots (about 1.5 cups chopped
  • 1 can garbanzo beans (chickpeas), drained and rinsed
  • 2 cloves garlic
  • 1 Tbs toasted sesame oil
  • 1 Tbs tahini
  • 1 Tbs lemon juice
  • 1 1/2 tsp smoked paprika
  • 1 tsp salt
  • Water as needed, approx. 6 Tbs

Preheat oven to 400 degrees.

Chop the carrots into 2 inch chunks. Spread evenly in non-stick pan, and lightly coat with oil.  Roast for 50 minutes, or until tender. After 25 minutes, coat peeled garlic cloves in oil, wrap in tinfoil (make a little package) and place with carrots. Optionally, leave raw for a spicier hummus.

Combine garbanzo beans and the rest of the ingredients in a blender or food processor. Blend until smooth, adding water as needed. After carrots and garlic have finished roasting and cooled slightly, add to hummus and blend well.


Nutritional Info: per 2 Tbs: 40 cals, 1.5g fat

Roasted Carrot Hummus

Warming Ginger-Turmeric Tea

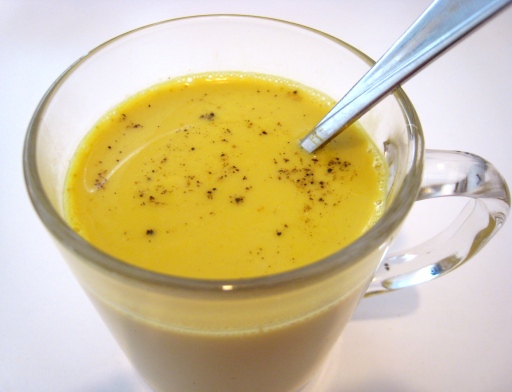
Creamy Ginger Turmeric Tea

Ever since I discovered the amazing anti-inflammatory powers of turmeric (among other benefits), I have been trying to incorporate into my diet daily. I’ve been suffering from migraines and headaches for as long as I can remember, and I used to live on a steady stream of Advil and other prescription remedies. It wasn’t until I read this book that I started to listen to my body and realized that my diet was playing a huge role in triggering my pain. I now focus on not eating my trigger foods (such as dairy and meat) and adding in anti-inflammatory foods such as the amazing turmeric and ginger.

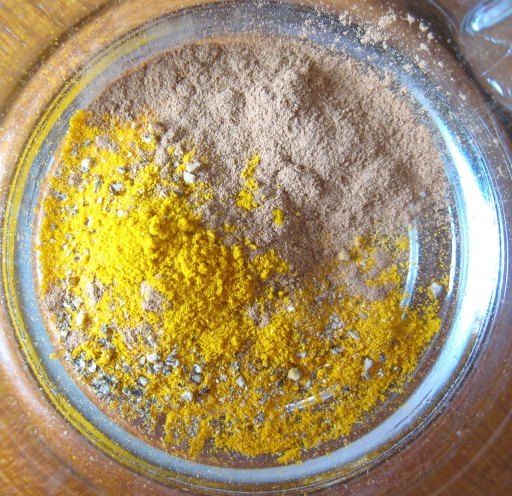
I came up with a mixture of turmeric, ginger and cinnamon, that I add to my tea each morning. On especially bad days where I wake up with a headache, I usually pack it in, using about 1 Tbs to 4oz of water. I call this my “morning sludge”, and I don’t think I could be productive without it, even if it isn’t the most appealing drink!

So when I found this recipe, I was excited to find a more delicious way to incorporate my favorite spices into a creamy, comforting drink.

Turmeric, cinnamon, black pepper

Creamy Ginger-Turmeric Tea
Based on the recipe by ezrandi and Mark’s Daily Apple

  • 1 cup almond milk, or milk of choice
  • 1/2 tsp turmeric
  • Heaping 1/8 tsp cinnamon
  • 1 good grating of fresh black pepper
  • 1 tsp fresh ginger juice* or 1/2 tsp dried ginger
  • 1 tsp sweetener or choice or 2 drops Stevia**
  • 1/2 tsp coconut butter (optional, but add creaminess)

Heat the almond milk and coconut butter over the stove. Add the dry spices to your mug. Once the almond milk is hot, add about a tablespoon of milk to the spices, and mix until smooth. Add the remaining almond milk, ginger juice if using, and sweetener. Mix well and top with another fresh grating of black pepper or a pinch of cinnamon.

Sit back and relax as you sip this creamy, warming drink!

* Grate about 1.5 Tbs ginger, and squeeze the juice into your mug
** My favorite flavors are english toffee and vanilla creme. So good!